Frozen Fever

I may have been away from this blog for a little while but I have still been baking on and off.

A few months ago, my daughter celebrated her birthday. For a good three or four months before her birthday, she was obsessed with the Disney film Moana. And we only picked up that film as part of a 2 for £12 offer on Disney DVDs in our local HMV. We had visited looking for Monster’s Inc. and had emerged from the store with characters Mike and Sully and Moana and Maui in our midst.

Image result for moana

As with most kids, I thought that the Moana phase was simply just that: a phase. However, Christmas rolled around and Moana was still a firm favourite with my daughter to the point where she was singing songs from the film and pretending to be Moana (if you’re interested, I was cast as the role of Moana’s grandma; Moana’s mother; and even Hei Hei the chicken!). We entered the new year and Moana was still going strong and that’s when I set up a board on Pinterest for potential ideas for a Moana themed birthday cake.

Image result for moana hei hei gif


I was SO excited to make this cake for her and knew that she would be uncontrollably excited for it. The sand of the beach was going to be made from crushed up biscuit; the sea was going to be ombre blue and turquoise colours piped like waves on the side of the cake; and I was even going to attempt a green swirl in the sponge for the Heart of Te Fiti. Her mind was going to be BLOWN.

And then came along two sisters in the form of Princesses Anna and Elsa.

See the source image

And Moana was given the cold shoulder and had taken a back seat and it was literally back to the drawing board for me and ideas for the cake.

The Frozen phase was (and still is) going strong so I gave in and decided to make a Frozen cake for her birthday.

Now, if you have been a follower for sometime or have had a browse through previous posts, you would have stumbled across the Frozen cupcakes I baked for my niece many moons ago. Atop of the cupcakes were faces made from fondant of the loveable snowman, Olaf. I would have loved to have made the fondant figures to go on top of the cake and I think it would have been absolutely doable however, long gone are the days where I can sit at a table for hours just listening to music and playing with icing. I have two small children to look after now and time is precious and valuable and so, where possible, I have to perhaps cut corners or do things that are convenient to me. So I have no shame in announcing that when I decided to make a Frozen themed birthday cake for my daughter, that I bought a Frozen figure playset from the Disney Store and used them as cake toppers. Plus, they doubled up as an extra birthday present, huzzah!

Again, a board was set up on Pinterest and I set to researching ideas for the cake. In the end, I had decided to make a snow scene for the cake decoration. I borrowed some snowflake cutters from my Mom’s baking arsenal (and wondered why I don’t have any of my own?!) and cut out a variety of snowflakes in different shapes and sizes.

I first covered the cake in a light blue fondant and then draped white fondant over this, with a snow fall effect on the edges. To do this, I cut out a rough circle of white fondant and then went round the edges in waves with a pizza wheel (who knew a pizza wheel could be used for something other than pizza?). Once the cake had been covered in fondant, I then placed the snowflakes on top et voila, the cake was decorated. Once I was happy with the positioning of the snowflakes, I ‘glued’ them down using a little brush of water on the back of each snowflake. Once everything had settled on top of the cake, I then placed the figures on top.

Frozen Fever

Frozen Fever

It was a really easy cake to decorate and, as it was my first cake that I have decorated in a very long while, I don’t think it turned out too bad. It’s perhaps not my best but it certainly isn’t my worst!

My daughter loved it and had fun picking off the little snowballs from around the cake. If I’m honest, she was probably about 65% sugar for the week after her birthday as she tends to eat the icing or fondant or ganache off of a cake and then leaves the actual sponge. And enter Mommy to finish off the cake because, you know, we can’t waste food, especially cake! ;p

Happy baking!

Ps If you’re wondering, the answer is yes. I do have the Maui rap nailed!

See the source image

Drip, drip, drop little April showers… Where?

My oh my. What a glorious few weeks of sunshine we have enjoyed here in the UK! It’s a little hard to believe that I actually caught a bit of sunshine on this, the Easter bank holiday weekend that I’m actually feeling a little warm from the sun burn!

“What? No rain? On a bank holiday weekend?” I hear you cry. 

Not a drop.

And that’s starting to make me twitch a little. 

You see, I’m all for the lovely weather and all the simple activities that comes with it: picnics, walks, playing on the park but, I guess I am desperate for a bit of rain just now. 

My husband took on an allotment plot towards the end of the season last year. He has been working so incredibly hard on it since January. From planning the outlay of the plot, to planting seeds and plug plants, and now finally starting to make the first transfers of those small plants into the ground, polytunnel and cages alike. When I first visited the plot with him, it was just a patch of land that needed a lot of weeding and a little TLC. I like things to be instant or to see a result of something pretty quickly. So when I visited the plot with my husband and our little family, I have to say that I had nothing but admiration for him. He has worked incredibly hard to get the plot looking as good as it does now. 

cof

I’m in awe.

The vision of taking on an allotment plot is to be self-sufficient. Think Tom and Barbara from the Goodlife (will insert pic here, just in case you have no idea who I’m talking about. And if  you still have no idea, have a little search on YouTube).

Image result for the good life

We want to be able to grow our own produce to cut down on both the cost and wastage of food we currently buy. We want to teach our children of where their food comes from and we want them to be involved in the growing and harvesting of the fruits of our (mostly my husband’s) labour. Most importantly, we want them to be aware of their environment and to do their bit to take care of this precious resource.

And after my husband has done the hard work of growing the crops, I want to use the produce in as many ways as I can in my baking, both sweet and savoury (Miranda Hart comes to mind when I type this! If you know, you know). 


Image result for miranda hart savoury muffin

Now, I know it is far too early to have a harvest of any of the crops we are growing but, on the neighbouring plot to my husband’s, there are chickens. The chap of who the plot belongs to has very kindly given us some eggs over the last few weeks in exchange for some onion, broad bean and beetroot plants (is this reminiscent of medieval trading? Can we all do this instead of using that filthy thing called money to get by in life?). As we have had more eggs than we usually consume, I have been given the perfect opportunity to do some baking with the kids (by this, I mean, they’re enthusiastic to start with but once the flour, sugar and butter have been weighed out, they’ve lost interest and headed back to the play doh until it’s time to lick the bowl clean). So far in the last week, I have made a lemon drizzle cake, banana bread loaf and some Easter bunny biscuits. I think a firm favourite was the lemon cake, something which I seldom make but it went nicely with a cup of tea. I will leave a link to the recipes I used and post a few pictures but, even though I am a huge baking enthusiast, a biscuit baker I am not. I think I’ll stick to baking cakes, bread and basically, anything that isn’t a biscuit!


We are also growing a small selection of fruits, vegetables and herbs in our small garden. And this evening, as I was bringing in the toys and putting the gravel back on the patio, I noticed the acers and a few other plants looking limp, drooping in the evening sun. I asked my husband if this was normal or if they had come to the end of their flowering season and he shook his head.

Whilst we are enjoying the sunshine and hearing the children play in the garden, we also need some rain now. The water butt is half full in the garden and no doubt, the natural resources down at the allotments will start to dwindle too and it will be a real struggle for everyone on the allotments to get a good harvest this year.

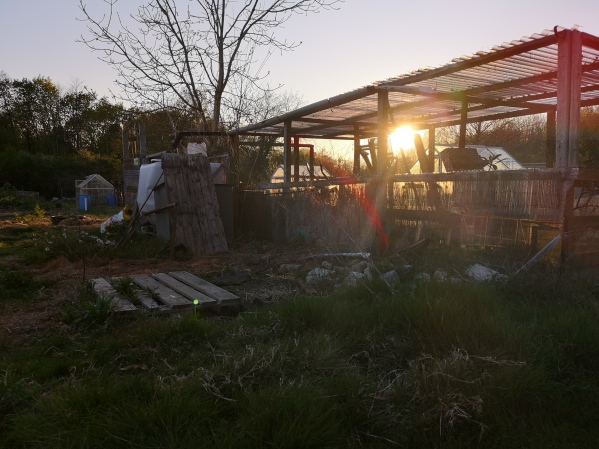
I will probably try to write a weekly update on the allotment plot if time and priorities allow and will try to share some pictures. Right now, I’m quite enjoying heading to the plot with the family to give it a water in the evenings and taking pictures in the setting sun. Everyone loves a bit of natural lens flare, right?

cof

Happy Easter!

Oh and if you started singing Aqua at the start of reading this post, then you are awesome!


Baking Break Up

Ok, so I guess that when I penned that last post, way back in 2016, I had told a big fat lie that I would share photos of recent baking experiences. To be honest, I can’t even remember what I was going to post up here! Probably a birthday cake? Maybe a tray of brownies? Who knows? *shrugs shoulders*
One thing I do know? I guess I had fallen out of love with baking for a little bit. There was no reason other than simply life got in the way. Family. Friends. Work. My priorities had shifted. And my enthusiasm for baking had waned a bit. Sadly, that meant baking had fallen to the bottom of my ever increasing to do list.
And so did writing.
This blog was a form of escapism for myself from that real world, from the hectic lifestyle I led and still do lead. However, I have found that recently when I have a few spare minutes to myself, I’m not actually doing anything for myself. I always seem to fill those few precious moments of peace by saying to myself, ‘I’ll just sort that load of laundry out,’ or ‘I’ll just give that bathroom a spruce,’ or ‘I’ll just go and sort the kids’ room out.’
So, I guess what I’m trying to say in a long convoluted way is that I am going to try to start writing again and to start documenting my baking experiments, along with my cooking adventures. I do like to be in the kitchen, especially on a Sunday afternoon, listening to BBC Radio 4, whilst cooking a roast dinner.
Pull up a chair and grab a drink and let’s see where the next few posts will take us.
Happy baking!


Happy Anniversary!

Apparently, today is the two year anniversary of my blog, according to WordPress.

*throws confetti*

So, here are a few pictures of my baking adventures at the weekend:

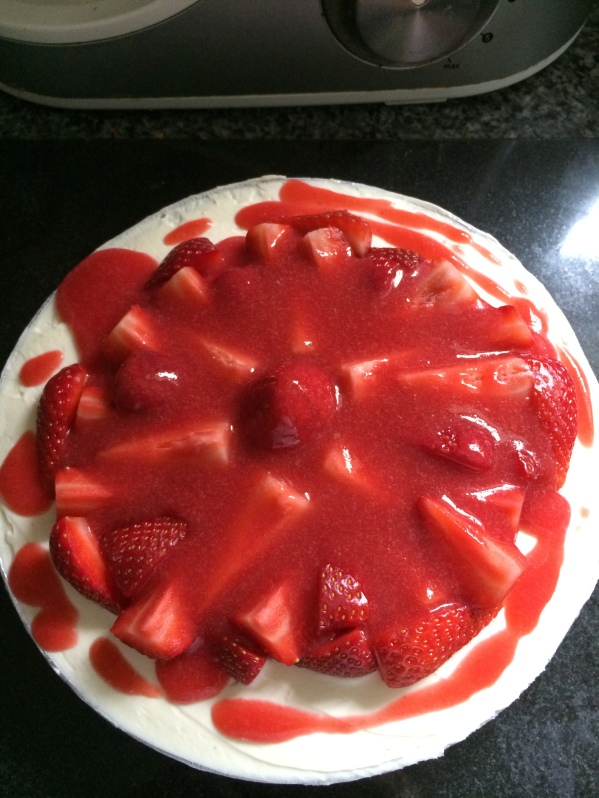
Cheesecake

Cheesecake

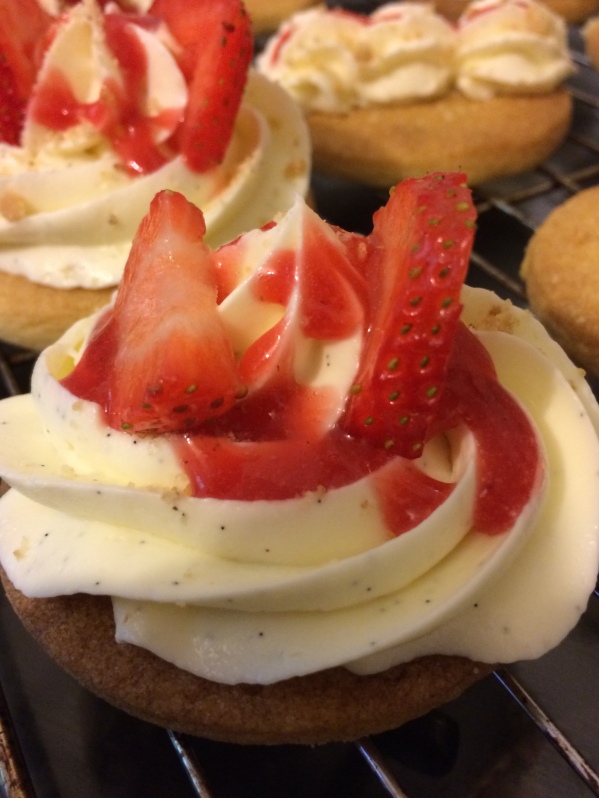
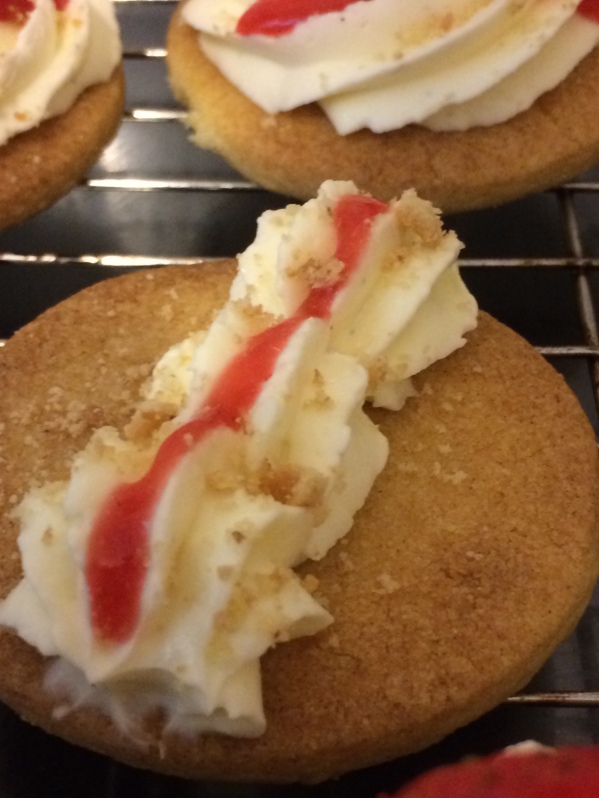
Cheesecake Shortbreads

Cheesecake Shortbreads

Cheesecake Shortbreads

Cheesecake Shortbreads

Over the weekend, I met up with family for lunch and had been asked to bring a pudding. My mum asked me to make a cheesecake and she took charge of making a death by chocolate cake. I always use a recipe from Good Food when making a strawberry cheesecake – it’s so easy to follow and gives great results every time. Fool proof! The only drawback with the recipe is that I always have too much cheese-y topping mix left over. I usually put the left over mix in the fridge with good intentions to use it at a later time, only for it to end up being thrown away.

But then I had a light bulb moment. I decided to make some little shortbread rounds and pipe the cheesecake mix on top of them.

Et voila! Strawberry cheesecake shortbreads are created!

Perfectly sized to fit in a lunchbox for work or for a cheeky after dinner treat ^_^

Happy two year anniversary pottersbakery.wordpress.com!

*throws more confetti*

🙂

Another Who Challenge

Ok, so I guess I shot myself in the foot two years ago when I made a Tardis cake for my niece.

Yes, she loved it.

Yes, it was Doctor Who themed and yes it was perfect for her being a big Doctor Who fan.

So what’s my problem?

SHE HAS A BIRTHDAY EVERY YEAR!

Last year, I made her those DW themed chocolate cupcakes and when I was asked this year to make her another DW themed cake, I was kinda stumped.

I do not yet have a Dalek cake pan in my baking arsenal nor do I have a Cyberman shaped tin. I do have a series of Who themed cookie cutters, but this was no cookie occasion. Oh no. This had to be cake and it had to be an epic one at that.

Admittedly, I turned to my ol’ friend Google and searched for inspiration. The many hits returned a myriad of Tardi (plural for Tardis??), Daleks and space scapes, with cleverly designed cupcakes to boot. And then, in the midst of the photographs and fan drawings, I stumbled across a bow tie cake.

*light bulb*

I’m almost certain that her favourite doctor is Matt Smith’s eleventh doctor (personally, I think David Tennant’s tenth doctor is the best but that’s another discussion for later!) and seeing as though I have already made a fez cake for another family birthday, I thought it would be a challenge to make a bow tie out of cake and fondant.

And that’s just what I did.

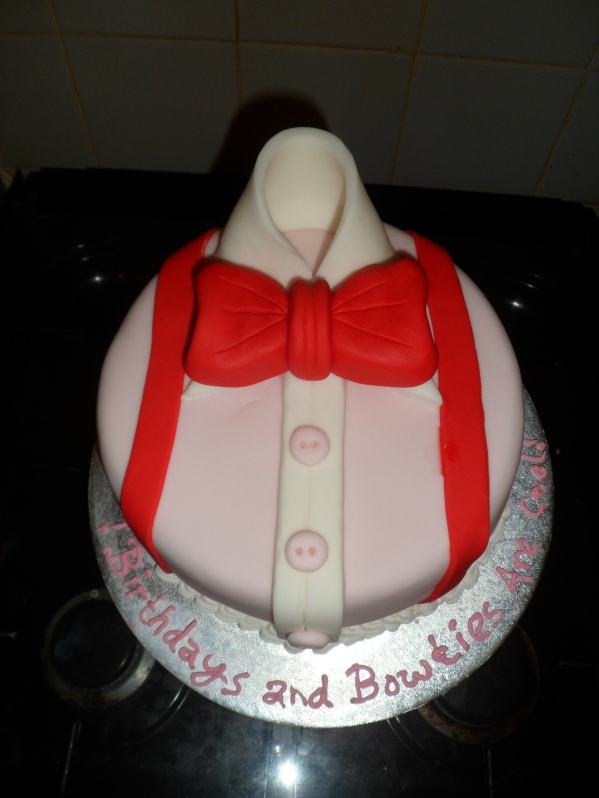
I took inspiration from shirt and tie cakes floating around and fashioned the cake on similar attire Smith wears for his regeneration of The Doctor.

I dyed a large piece of fondant light pink to use for a shirt; and a smaller piece red to use for the bow tie and braces.

I adapted a red velvet recipe and baked two blue velvet cakes (blue for the Tardis. See what I did there? Blue for a blue box? Huh? Huh?!). The smell of chocolate in my kitchen was AMAZING and the colour of the sponge after I had levelled the cake off was a fantastic bright blue. I didn’t want to use a cream cheese frosting to sandwich the two cakes together and opted for marshmallow fluff and chocolate fudge icing instead. This seemed like a good idea, but in my warm kitchen, as I prepared dinner, the cake had other ideas; the filling started to melt! I tidied the edges up and moved the cake to a cooler room until I needed it. Crisis adverted. Phew.

*wipes brow*

A few hours had passed and my kitchen became cool enough to work in. I took out my shiny new turntable (thanks to my lovely friend for the birthday gift!) and set to work.
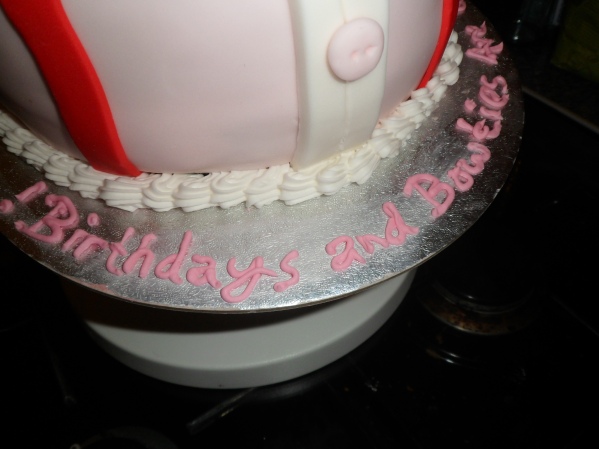
First, I rolled out the pink fondant and covered the cake with it. I then took some white fondant and fashioned a shirt collar and placed it atop of the cake. Next, I rolled out two thin strips of red fondant and cut them to size for the braces and finally, I made the bow tie.

I had originally made white chocolate buttons (with a snazzy chocolate button mould I had picked up from a cook shop) but when I handled them in my now cool kitchen, they began to melt. So I decided to not take a risk with chocolate and made some buttons from fondant. I assembled the shirt and bow tie on the cake before adding finishing touches with royal icing.

Birthdays and Bowties are Cool

Birthdays and Bowties are Cool

The birthday girl had no idea that she was going to get yet another Doctor Who cake and I think it’s safe to say that she was utterly surprised and enjoyed it very much

🙂

Bow Ties are Cool

Bow Ties are Cool

A Disney Themed Birthday

I have a friend who is very dear to me and whom I have known for a very long time. She absolutely adores Disney and it was only natural that she had Disney Princess themed cupcakes for her birthday, back in September.

This has been one of my favourite projects so far.

Why?

Lean in close, I want to confess something to you:

I LOVE DISNEY TOO!

I had been given a Disney compilation album as a gift last Christmas from The Hubs and played it full blast as I played with fondant to create items related to each Disney Princess.

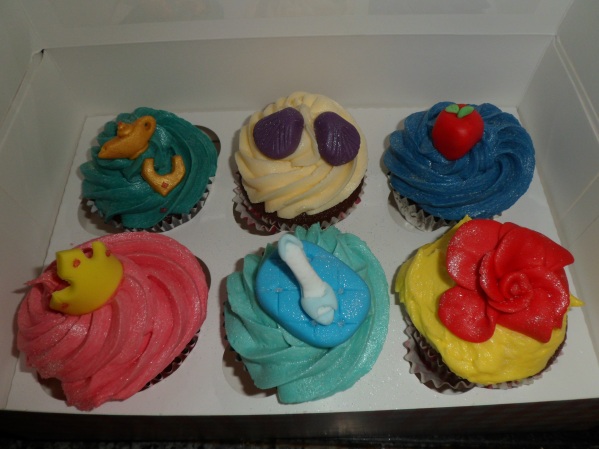
I used my usual go to recipe for chocolate cupcakes. While the cakes cooled, I whipped up a batch of vanilla buttercream and then separated it between six bowls. I coloured each bowl of icing to correspond with the colour of the dress each Disney Princess wears: Turquoise for Jasmine; royal blue for Snow White; pink for Aurora; light blue for Cinderella; and yellow for Belle. Now, before you start shouting “What about Ariel? She’s a mermaid, with a turquoise tail and fins! Why is she cream?!” I shall tell you. I didn’t want her to clash with Jasmine, so left her cake a plain colour.
I then piped a swirl on top of each cake and then decorated with the toppers I had made.

Needless to say, the birthday girl enjoyed them 🙂

Disney Princess Cupcakes

Disney Princess Cupcakes

Baking Projects: April – July Part #1

It’s been a while since my last post and I thought it was about high time that I shared some recent (and not so recent) creations with you.

March and April are months filled with many a birthday, which gives me many a baking and creating opportunity.

The last birthday to celebrate in April was that of my brother-in-law. He loves reading and is an avid fan of The Godfather.

“What did you bake for him?” I hear you cry!
Well, my dearest reader of this blog, I will tell you, nay, I will show you:

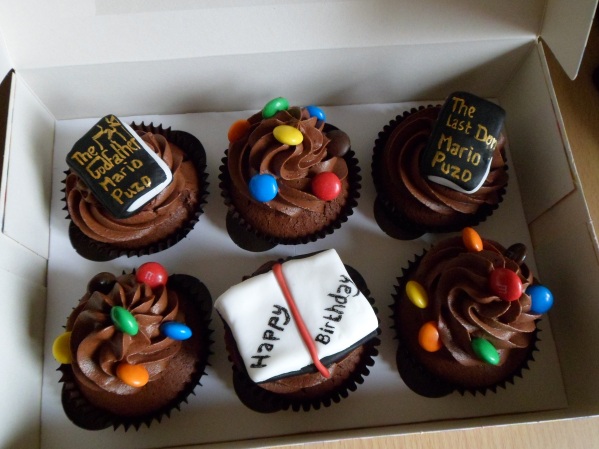
Cupcakes Inspired by The Godfather

Cupcakes Inspired by The Godfather

Cupcakes Inspired by The Godfather

Cupcakes Inspired by The Godfather

My lovely bro-in-law was presented with some scrumptious chocolate cupcakes, with swirled chocolate frosting and bookish themed cake toppers. I can’t quite remember how long it took to make the toppers, but I do know that I watched some sort of chick flick to keep me entertained (the title of which escapes me, but if I had to guess, it was probably Bridget Jones’ Diary or My Big Fat Greek Wedding). Initially, I was quite happy to leave the books made from fondant, plain. I then remembered that I had some gold paint and wouldn’t rest until I had *attempted* to re-create the book jackets of Mario Puzo’s novels in sugar form. This was lots of fun to do and required an awful lot of concentration and the obligatory tongue-stuck-out-to-help-me-concentrate -look. It works, honest.
I wasn’t home when he collected them but The Hubs said that he really liked them. I just hope he enjoyed munching them ^_^

May passed by without a birthday to be seen and then we said hello to June.
June = three birthdays.

My father-in-law and Hubs’ birthdays are literally the day after each other’s, so as you can imagine, it was a busy weekend for me. Unfortunately, by the time I had baked (that term is used loosely for this cake) the cake for my father-in-law, it was pretty much time to go and visit him. My problem: it had sunk after I had taken it out of the oven!
This NEVER happens to me! Distraught, I walked myself to the local supermarket to by a fresh Victoria cream cake. That’s the ONLY time I have given someone a cake for their birthday that I haven’t made. He was very appreciative of it, none the less.

Next day: The Hubs’ birthday.

He’s not too fond of fondant icing (fond used too much there!) or buttercream, so I opted to make him an Amaretto cake. Naturally, I used this excuse to buy a new bottle of Disaronno… The recipe I used called for almond essence, ground almonds and a few tablespoons of amaretto. I used a deep tin (the one I usually use for Christmas cakes) to bake the mixture in. I baked the cake in the oven for three hours, on a low heat and the smell that enveloped my kitchen and living room was a dream. As I had baked this fairly late at night, the smell lingered and was something nice for The Hubs to wake up to on his birthday. Although evenly baked and a lovely golden colour on top, the cake looked a little too plain, so, I made him a cake topper.
He is a fan of motorbikes and that’s just what I made for him.
I present to you a Kawasaki VN900 Custom:

Cake Topper: Kawasaki vn900 Custom

Cake Topper: Kawasaki vn900 Custom

I coloured and used fondant, and as you can see, the bike is very much 2D rather than 3D.

I might just have to stock up on gum paste for future projects like this…

Stay tuned for Baking Projects: April – July Part #2

Mad March Part #3 – Egg-cellent Easter Baking, it’s no yolk!

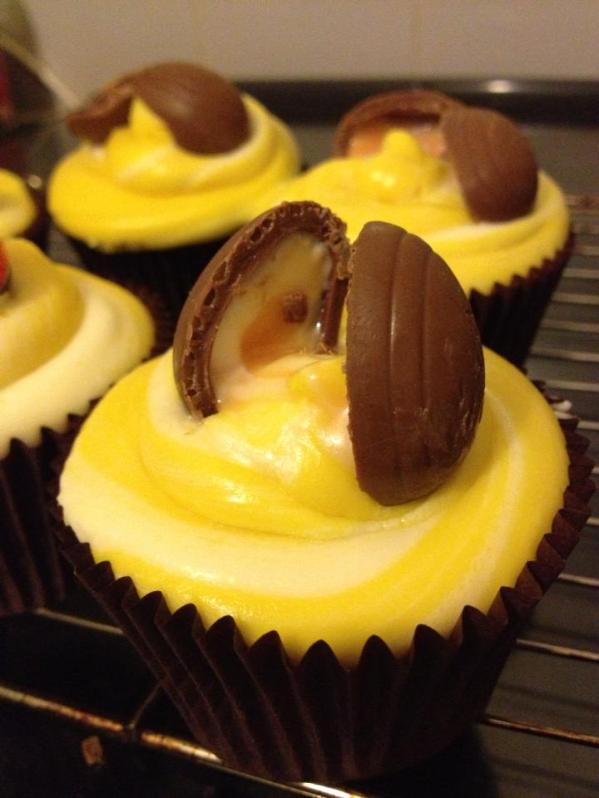
Creme Egg CupcakesThis year, my Easter egg-stravaganza baking took inspiration from many a picture I saw floating around on FaceBook and Pinterest.

At Easter, I usually bake hot cross buns (my fav Easter treat!) and make the obligatory Easter egg nest, (minus a few Cadbury’s Mini Eggs during the process!) but this year, I wanted to do something different. Cue Cadbury’s Creme Egg cupcakes post!

I was very excited to be undertaking this mini challenge I set for myself. For the base of these cheeky treats, I made chocolate cupcakes (would there be any other flavour at Easter?!). This part was easy enough on it’s own, but I set myself the challenge of making a creme egg fondant for the topping.

I searched through the Internet for a recipe that would provide me with the right texture and taste of creme egg fondant, but one that would not give me a mass of left over goo. The recipe I found was okay, and used a mix of icing sugar and golden syrup and yellow food colouring to make the goo. It gave a good texture and looked close to the real thing but it tasted far too sweet and the taste of golden syrup was overpowering. If I were to make these again (the probability of this happening is quite high!) then I think I might substitue the golden syrup for liquid glucose.

After I had made the goo, I wanted to get a two toned effect when I piped the icing on top of the cakes, just like inside the real creme egg. For this, I made a cream cheese icing and filled a piping bag with both the goo and icing. This, in itself, requried a lot of concentration and sticking out of a tongue, to be careful not to mix the two colours before they were needed! Once this was done, and I was happy that the amounts of icing and goo were equal, I set about piping the mixture on top of the cakes, and finishing each one with a broken Mini Creme Egg.

Creme Egg Inspired Cupcakes!

Creme Egg Inspired Cupcakes!

This was a fun project and I will deffo be making them again! ^_^

Mad March Part #2 – Birthdays

Tardis!Aside from Mother’s Day and Comic relief, March is also the time of year when two family members celebrate a birthday, on the SAME DAY!

This year, I only had a week between Mother’s Day and my mum’s birthday and that meant that she was lucky enough to enjoy cake twice in one week! After baking her some cupcakes I decided to bake an actual cake she could cut into pieces and share, if she wanted to.

I have seen many ombre style cakes floating around on Pinterest and Face Book and thought I would have a go at this for my mum’s birthday cake.
As I haven’t got a turntable (that will all change come next pay day!) I decided not to pipe buttercream roses around the outside of the cake, but instead opted to decorate it with fondant icing. The ombre effect for the cake was hidden underneath the fondant, a surprise for when she cut into it! Mwhahaha!

To bake the cake, I used a basic vanilla sponge recipe and set out to weigh enough ingredients for three individual cakes or layers. I divided the cake mixture evenly between three bowls and set to colouring each mix with a different shade of pink gel food colouring. The gradual increase of shades of pink in the cake would give the desired ombre effect. Once an even colour was achieved, I poured the cake mixture into three individual tins, before placing them in the oven to bake. Of course, because this was a birthday cake, I naturally sung happy birthday to them whilst they were baking away in the oven.

NB: I always sing/talk to my cakes in some shape or form whilst they’re in the oven. No, I’m not crazy, just quirky. Plus, a scientific study I read a couple of years ago showed results that if plants are spoken to as they are growing, then they grow and thrive really well. It is at this point I will introduce my Easter cactus Sheila, and my orchid, Ophelia. NOT crazy but quirky! I figured if this works for plants then surely it would work for cakes, too!

Anyway, after the cakes had baked and cooled, I assembled them into their layers. I decided to ‘sandwich’ them together with raspberry jam and coat the cake in butter cream, to give an even surface for the fondant. After the assembly was complete, I covered the cake in fondant and then decorated it with flowers I had cut out using my super cool plunger cutters. As soon as I had finished decorating, I took the cake around to the birthday girl! I think she liked it :p

Mum's Birthday Cake

A piece of cake!

As I mentioned earlier, there was another birthday being celebrated on the same day as my mother’s and that was the birthday of my niece.
Last year, I made her an entire Tardis, complete with the Doctor and Amy. I knew nothing was going to top that, so I thought double chocolate cupcakes might come close. I mean, who doesn’t like a good ol’ chocolate cake? Crazy people, that’s who!
The recipe I used for the chocolate cupcakes is one which I found on the internet some time ago, but I can’t remember exactly where I got it from! When I find the link, I’ll post it on here. It’s dead easy to follow and always produces excellent, moist cakes every time. Deffo a winner! So too was the chocolate buttercream I used. Again, another recipe copied down from the internet, but I can’t remember where it came from.

And now time for a sad little confession: I was mega excited to be using my shiny, new icing nozzle for this project. I’ve always wanted to create an ‘ice cream swirl’ effect on top of my cakes and have always had to make do with something that looked a little like what I wanted. But now I have that very tool in my arsenal and I was very impressed with the outcome! Mwhahaha!

After I piped the chocolate buttercream on top of the cakes (it smelled A-M-A-Z-I-N-G!) I sprinkled white chocolate stars over them. This had to be done quickly as the stars started to melt (which, in itself could sound like the title to a Doctor Who episode!). I then took out my supply of ready coloured fondant icing and started to get creative. I made mini Tardi (plural?!), bow ties and a fez and then placed them on top of the cakes, added them to the box and gave them to the birthday girl. I can confirm that she really enjoyed them and what’s more, she really wanted a birthday cake with a fez. Result!

Birthdays are cool!